
So it's that time of the year again when we all begin frantically planning presents and gifts for our loved ones and spending hours coming up with that one perfect gift idea for that special someone! This year we have decided that instead of spending loads of money (that we don't have) on gifts for our friends and family and dragging ourselves from one busy shop to the next trying desperately to find the perfect present, we are going to attempt to create our own unique gifts for everyone! We got some inspiration from other bloggers and websites which gave us inspiration and ideas for what types of presents to make and we decided on a beauty hamper gift (obviously) as we think it is so cute and who doesn't like a beauty hamper right? As you probably know by now, we are all about beauty, fashion and trying new things, we love putting lot's of thought into people's presents and making them look cute and unique and with it being our summer holidays we have a lot of free time so why not fill it with DIY projects especially if we are using them as gifts!
Christmas is so exciting for us and we love the idea of making our own presents and feeling the great sense of satisfaction of seeing people smile when they open their gifts (hopefully)! Here are the recipes for the things we have made as well as photos of the finished product!
Christmas is so exciting for us and we love the idea of making our own presents and feeling the great sense of satisfaction of seeing people smile when they open their gifts (hopefully)! Here are the recipes for the things we have made as well as photos of the finished product!
Vanilla Brown Sugar Body Scrub:
We thought that body scrub would be the perfect thing to add to a hamper or even give as a simple gift by itself and we were right! The scrub was amazing and ridiculously easy to make! It smells like Christmas and looks good enough to eat! We highly recommend making this if you need that extra something to add to a present and don't want to spend a lot of money!

Mix all the ingredients together in a bowl. After all the ingredients are well-mixed, place in the fridge for about half an hour. (this step is optional - we found that this made the mixture a little thicker and easier to apply as a scrub) After removing the mixture from the fridge you may find that it is hard, if you leave it in room temperature for about ten minutes it will start to soften and will need to be mixed together again before becoming the perfect consistency! After you're mixture is the right texture, transfer it into a jar or tub of you're choice with a lid. Now you have a perfect inexpensive simple gift to give to a friend or family member!


We thought that body scrub would be the perfect thing to add to a hamper or even give as a simple gift by itself and we were right! The scrub was amazing and ridiculously easy to make! It smells like Christmas and looks good enough to eat! We highly recommend making this if you need that extra something to add to a present and don't want to spend a lot of money!
Ingredients (makes 2 medium sized jars)
- 1 cup brown sugar
- 1/2 cup coconut oil
- 1/2 teaspoon vitamin E oil (you can also use bio oil)
- 1 tsp vanilla extract


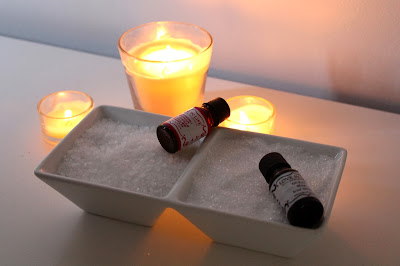
Bath Salts:
Everyone loves a good, relaxing bath especially when it smells amazing and leaves you feeling completely refreshed when you get out. It fits perfectly with the style of this hamper and is so easy to make that we thought we had done something wrong! But whether you use it as a gift on its own or as part of a hamper like us it is a perfect cheap and easy gift to give to your friends and family.
Ingredients (makes 1 medium sized jar)
- 1 cup sea salt
- 1 cup epsom salt
- Any essential oil

Mix your two salts together in a bowl and gradually add your essential oil mixing it well to make sure all the salt is covered. You can also add in dried herbs or extra scent if you'd like, just grind them to a powder before you add it to your salts. Put the salt mixture into a jar or tin (we got ours from a local dollar store), screw the lid on and you're finished! That's all it takes, like we said, super easy! We decorated our jars with lace but whether you do this or not is completely up to you and you can always change the decorations depending on what you like or what suits the person you are giving it too. Keep the salts sealed and sprinkle a few spoons into the bath to use it and there you go, a simple and extremely cute gift for anyone who likes a good bath, which really is everyone! Enjoy!

Candles:
In our eyes a hamper isn't complete without candles. Personally we are obsessed, we won't even try to count how many we have, lets just say it's probably too many! Although it is summer here and it isn't a traditional cosy Christmas there is always room for candles in a gift, whether you decide to wait until winter or use them right away everyone loves a candle in their rooms. You'll be surprised at how easy they are to make, we were apprehensive at first, we thought it would be too complicated but it turned out to be as easy as our other diys, and you only need a few things.
Ingredients:
- Tea lights (you can use any colour or scent)
- Candle wicks
- Hot glue gun (optional)
- Hot glue gun (optional)
- Jars
- A small pot
- Any essential oils

Before you start making any candles you will want to prepare you jars, we got ours from the local dollar stores. To prepare the jars you just need to remove any labels stuck to the glass and put the wick inside, we got a length of candle wick from a craft store and cut it to the size we needed. We found the best way to secure the wick to the base of the jar was using a hot glue gun but if you don't have access to one sticky tape will work too. Once the wick is stuck to the base you need a way to hold it up and in place whilst your candle sets, to do this we tied two wooden kebab sticks together with elastic bands and had the wick secured in-between them to hold it up.
Now that your jar is prepared you can move onto the actual candle. Firstly you need to remove the tin and wick from your tea lights, we got a big bag of unscented, white ones from the craft store (the tin should come off quite easily and you can then take the wick out from the bottom on the candle). Once you have done this you need melt them, to do this you will need to boil some water in a medium sized pot and place a smaller pot on top of the water (preferably an old or cheap pot that you don't need as it will get wax on it) and essentially create a double boiler. Once the water is boiling turn the stove down to a medium heat and add your tea lights to the smaller pot, using an old spoon or like we did, a wooden kebab stick from the pack we bought, stir the candles as they melt into a clear liquid. As the candles melt you can add a few drops of your essential oils to add your scent assuming, like us, you bought standard unscented tea lights, if they are already scented just leave the candles to melt.
Now the exciting part, once your candles have completely melted you can pour the wax into your prepared jars. We advise doing this inside an old container or on an old tray as it's likely that the wax will spill and it can be hard to remove. Being careful not to burn yourself pour the wax into the jar, without moving the wick if possible, until it is as full as you'd like it to be and leave it to set. We found that once the wax had set it had left a hole in the candle so if this happens just melt a few more tea lights, add your scent, and re fill the jar, this should fill the hole and once set you won't even know it was there.
When your candles have completely set you can remove the sticks and cut the wick to the right size and you're done. You can add little decorations to your candles if you'd like, we think they look so cute with little lace bows or labels but even by themselves they are perfect!
And that's it! After writing it all out it looks like a long process but once you get going it goes quite quickly and you can easily end up making a lot of candles for your hampers or even as gifts on there own.


We can't wait to give everyone their diy gifts for christmas! We think our friends and family will appreciate the thought and effort put into making these presents and hopefully we'll see a smile on their faces when they open their hampers and enjoy the wonderful relaxing treats inside.
Merry Christmas
Love,
Megan and Gabby xox
No comments:
Post a Comment